Register Your App
Every Pi app must be registered in the Pi Developer Portal before it can connect to the Pi Blockchain. Registering an app gives you:
- A record of your app on the Pi App Platform.
- A Server API Key for backend calls to the Platform API.
- An app wallet to receive Pi payments.
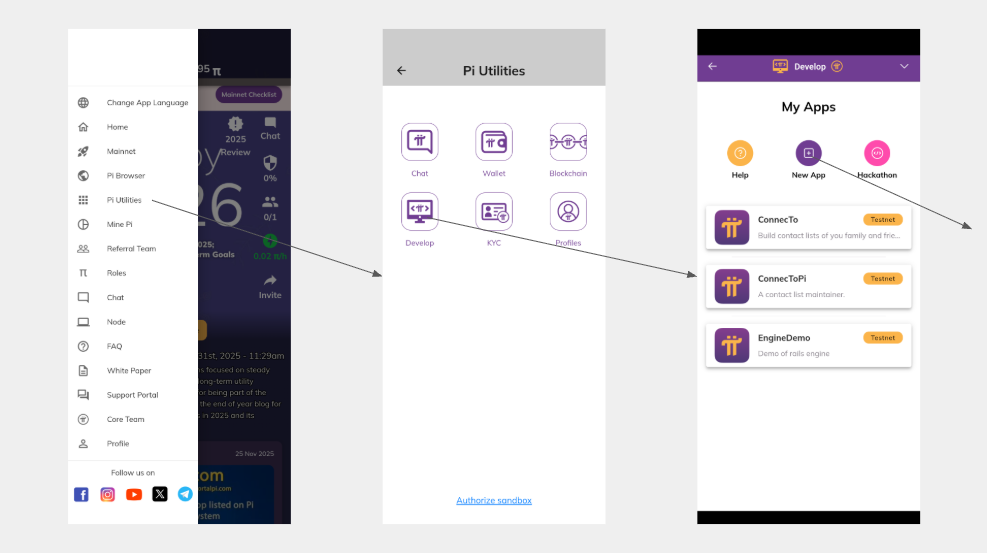
Open the Developer Portal
The Developer Portal is only available inside the Pi Browser. Open
pi://develop.pinet.com, or tap the Develop icon on the Pi Browser home screen.
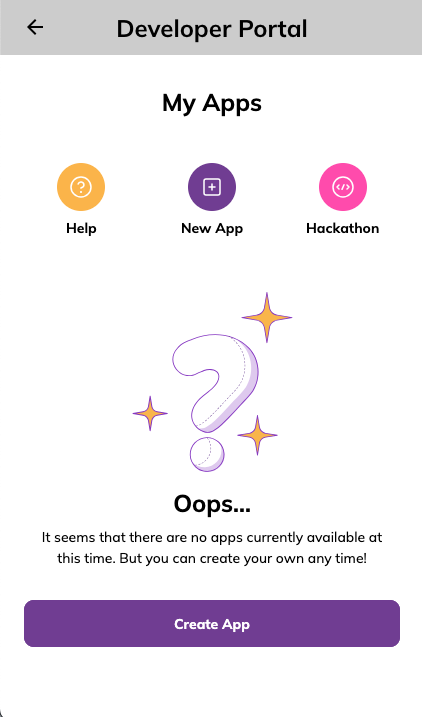
The first time you visit, no apps are listed. Tap New App to register one. To open an app you already registered, tap its tile to reach the app dashboard, where you can view and edit its details.
Create the app
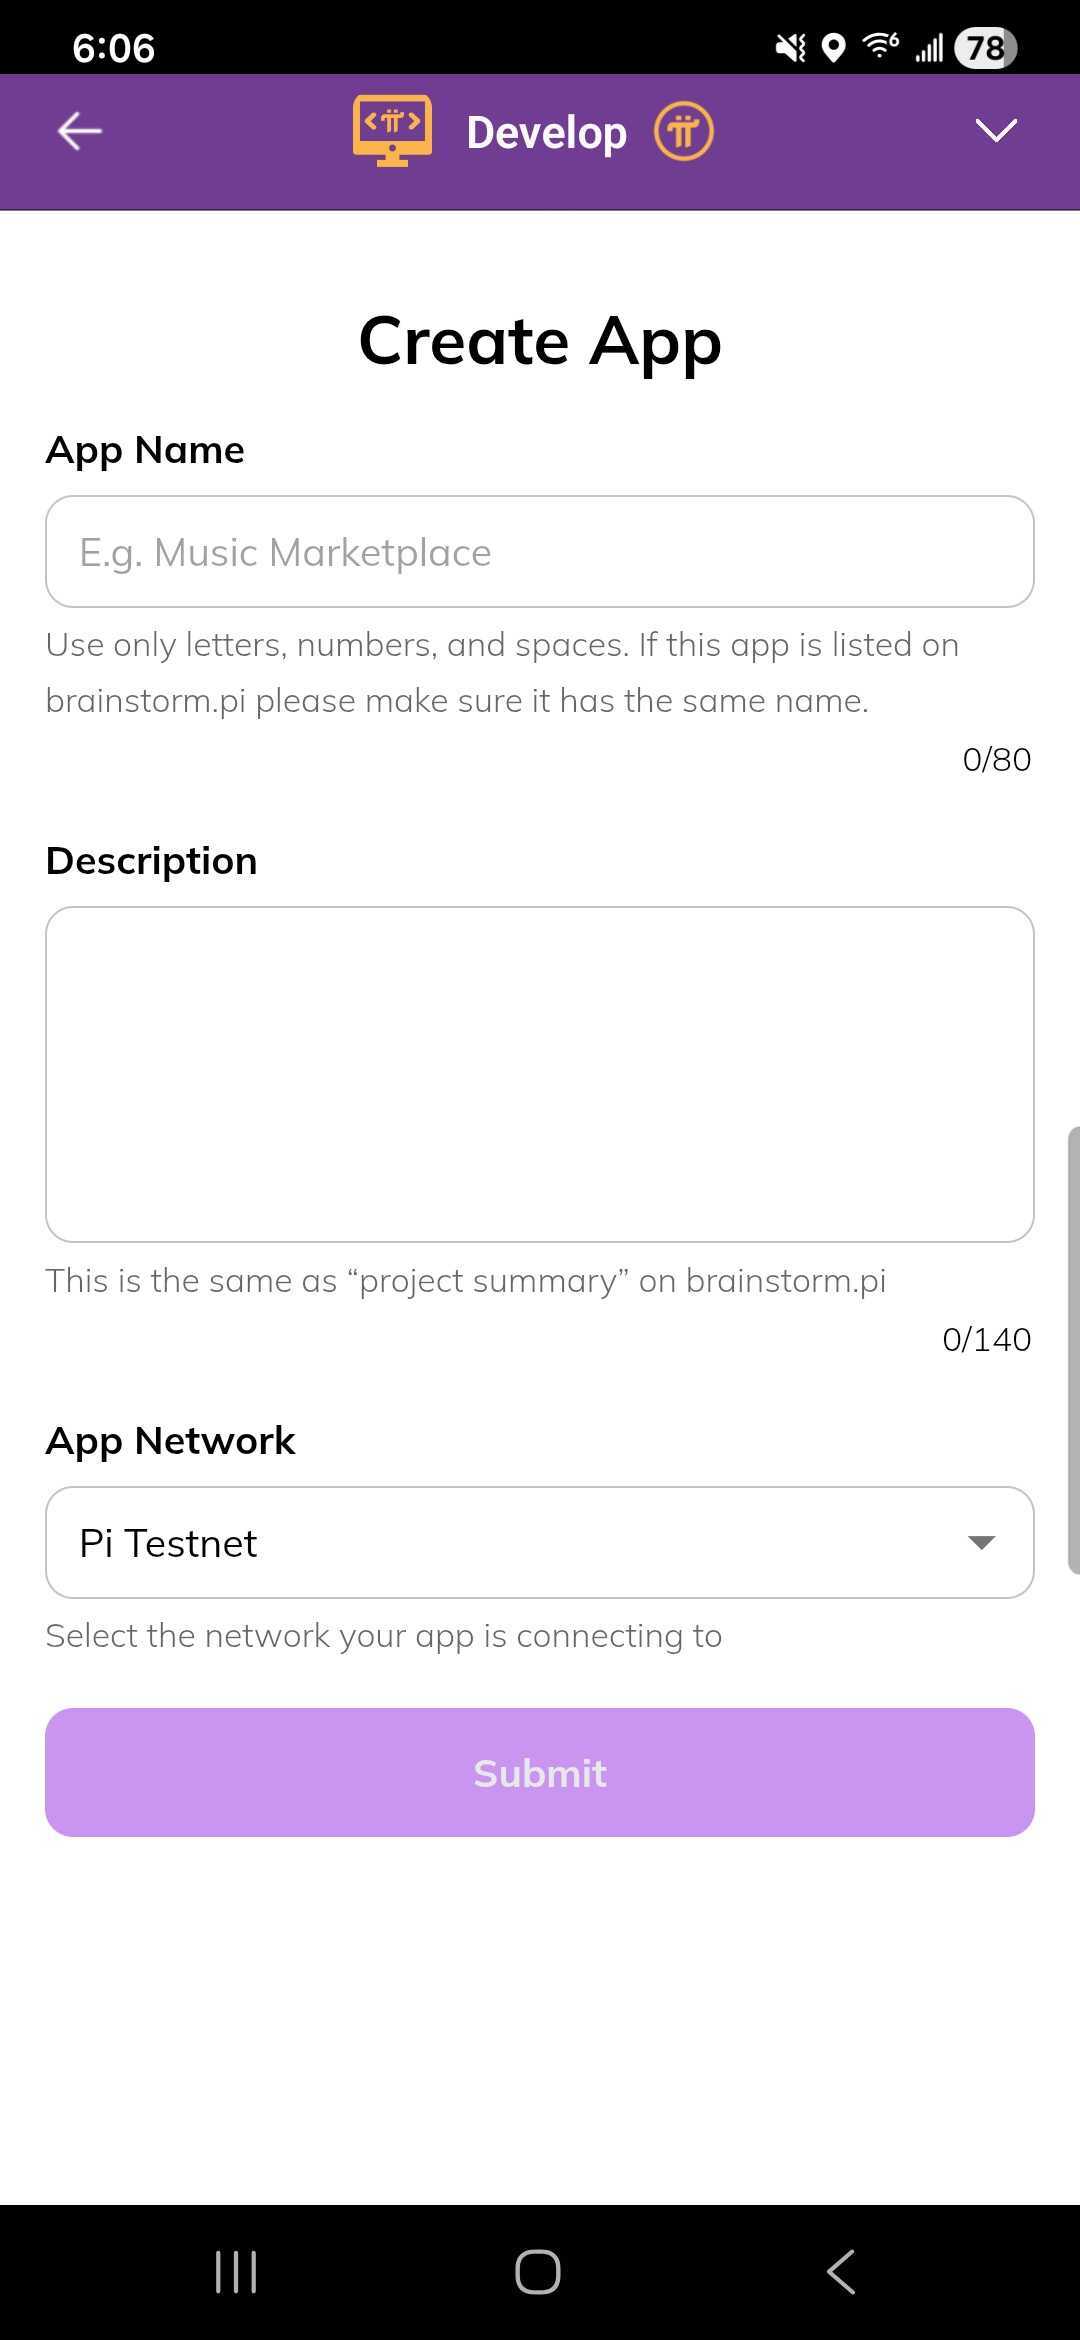
You are asked for three required fields.
| Field | What to enter |
|---|---|
| App Name | The name Pioneers will see. |
| Description | A short summary of what your app does. |
| App Network | The blockchain network your app connects to — Pi Mainnet or Pi Testnet. |
App Network cannot be changed after registration.
The Pi SDK connects your app to whichever network you pick here, and an app can only connect to one network at a time. Register two apps: one on Testnet for development, and one on Mainnet for production.
Set your development URL
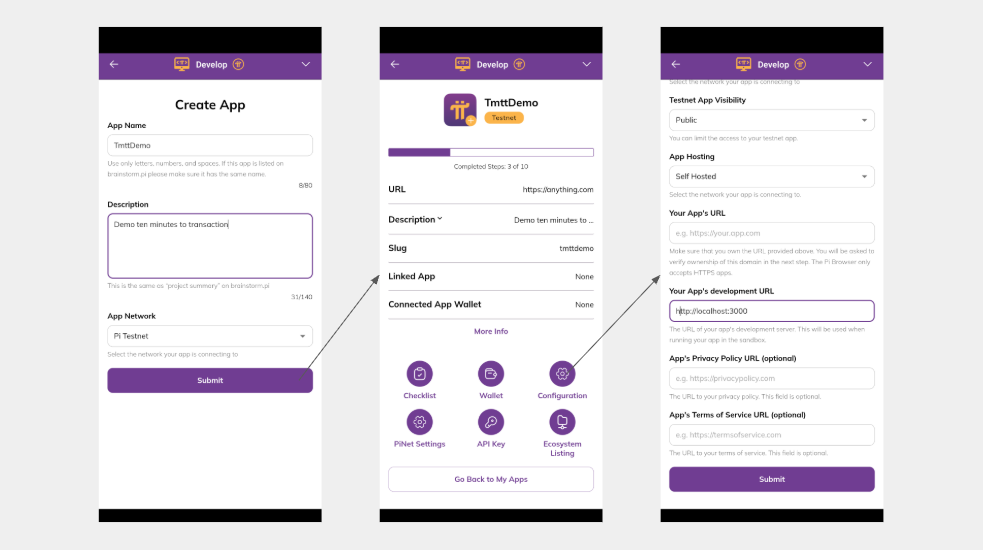
Your development URL is the local address your development server listens on — for example
http://localhost:3000, the default for many web frameworks. Pi maps this onto a Sandbox URL
so you can test in a desktop browser.
For how the development, hosted, sandbox, and production URLs relate to each other, see Using Pi URLs.
Get your API key and app wallet
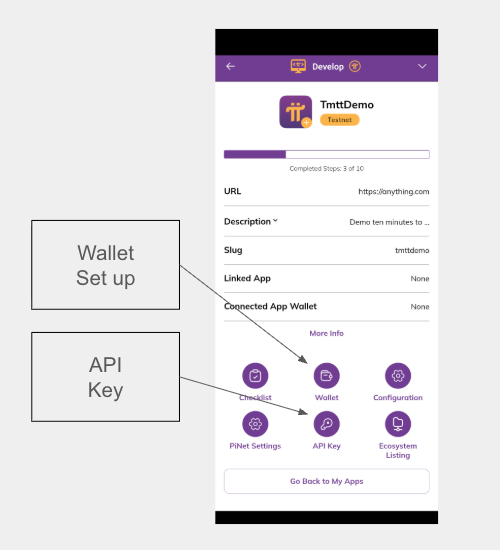
From the app dashboard, tap API Key to generate your Server API Key. Your backend uses this key to authorize calls to the Platform API.
Keep the Server API Key on your server. Never include it in client-side code.
Next, create a wallet for the app. This wallet receives Pi payments from your app. Store its private key securely — it cannot be recovered.
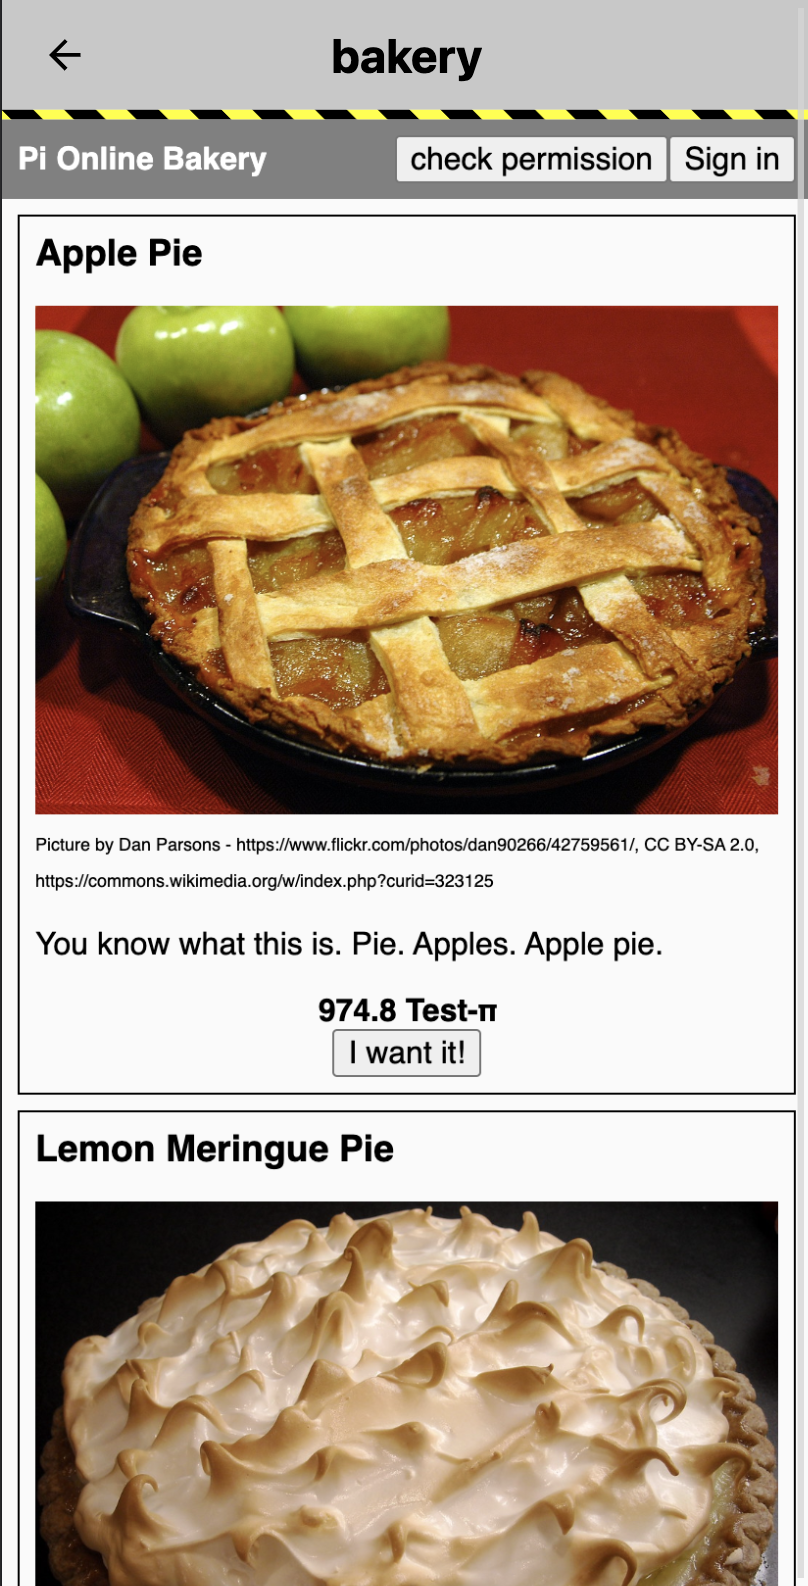
Testnet apps in the Pi Browser
If your app connects to the Pi Testnet, visiting it in the Pi Browser shows a black and yellow stripe across the top of the screen. This confirms the app is on Testnet.
Legacy projects (created before 26/07/2022)
Projects created before the Pi Mainnet SDK launched point at the Pi Testnet. This cannot be changed, so create new Developer Portal projects for those apps.
- Create a new Mainnet project.
- Set the URL that Pioneers will use to reach the app in the Pi Browser. URL ownership is confirmed through a verification process.
- Until developer/app wallets are created, the wallet address of the developer who created the project is used to process all transactions. If that developer has no Mainnet-migrated Pi Wallet address, all transactions will fail.
- Create a second project on Testnet for testing.
- Its URL cannot match the Mainnet URL, and must also be owned by you.
- This project can be linked to the Mainnet project from step 1.
- Link the Mainnet project to your Brainstorm project, if applicable. Only one Developer Portal project can be linked to a Brainstorm project.
If no member of your app team has a Mainnet wallet, contact the Pi Core Team through the Pi Support Portal. Under “What does your question relate to?”, select Pi Mainnet SDK Wallet and submit your contact information.
Next
With your app registered, you have everything you need to write code: Build an App.